Brother Sewing Machine Instruction Manual: A Comprehensive Guide
This manual provides detailed guidance for Brother sewing machine users, covering setup, operation, troubleshooting, and maintenance. Explore models like the PQ1600S and XR27NT!
Understanding Your Brother Sewing Machine
Brother sewing machines offer a diverse range of features, catering to beginners and experienced sewists alike. Familiarizing yourself with your specific model is crucial for optimal performance. This section will guide you through the core components and functionalities.
Understanding the interplay between the upper thread and bobbin is fundamental. Proper threading, as detailed later, ensures consistent stitch formation. Explore the various stitch patterns available – from basic straight stitches to advanced decorative options.
Software like Brother iPrint&Scan enhances functionality, enabling printing and scanning capabilities. Remember to regularly check for firmware updates, though be aware that updates may erase stored data. Knowing your machine’s serial number is vital for warranty claims and accessing support resources.
Machine Model Identification
Identifying your Brother sewing machine model is the first step towards accessing specific support and resources. Brother offers a wide array of machines, including the Inventio NV1350, Celeste Innov-is CX1, L14s, LX17, and high-speed models like the PQ1600S and FS110X.
The model number is typically located on a sticker or plate on the machine’s body, often on the underside or back. This information is essential when downloading drivers, accessing the online manual, or contacting customer support.
Knowing your model unlocks access to tailored instructions and troubleshooting guides. Utilize the Brother website to explore features specific to your machine and ensure compatibility with software like iPrint&Scan.
Locating the Serial Number
Finding your Brother sewing machine’s serial number is crucial for warranty claims, software downloads, and accessing personalized support. The serial number is a unique 15-digit code identifying your specific machine. It’s typically found on the same sticker or plate as the model number, usually located on the machine’s underside or rear panel.
This number is also required when using the Machine Warranty Calculator on the Brother website to determine your warranty status. Ensure accurate entry of the serial number and purchase date for verification.
Keep this number readily available for future reference, as it’s essential for all service-related inquiries.
Initial Setup and Preparation
Before beginning your sewing journey with your Brother machine, proper initial setup is vital. This includes carefully unpacking all components and ensuring the power cord is securely connected. Familiarize yourself with the machine’s key parts, referencing the diagrams in this manual.
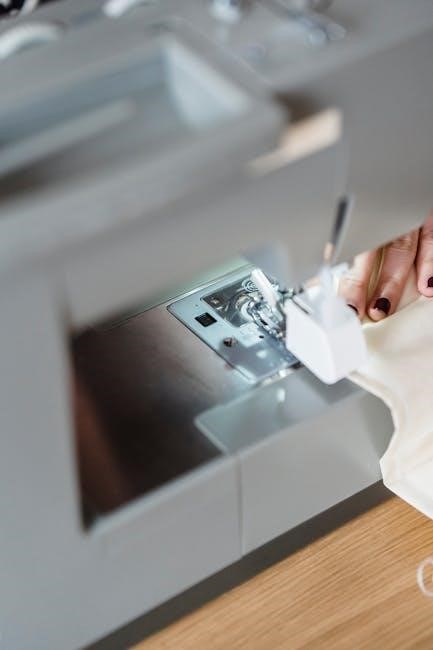
Crucially, you’ll need to wind the bobbin and thread the upper thread correctly – detailed instructions for these processes follow. Ensure the presser foot is down before threading, and always use quality thread compatible with your fabric.
A test stitch on scrap fabric confirms correct setup.
Winding the Bobbin
Proper bobbin winding is essential for consistent stitch quality. Begin by placing the thread spool on the spool pin. Guide the thread through the thread guides, ensuring it engages the tension disc. Next, thread the end of the thread through the bobbin’s central hole and secure it by winding it around the bobbin several times.
Place the bobbin onto the bobbin winder spindle and push it to the right to engage. Press the foot pedal gently to start winding; the machine will automatically stop when full. Remove the bobbin and trim the thread end.
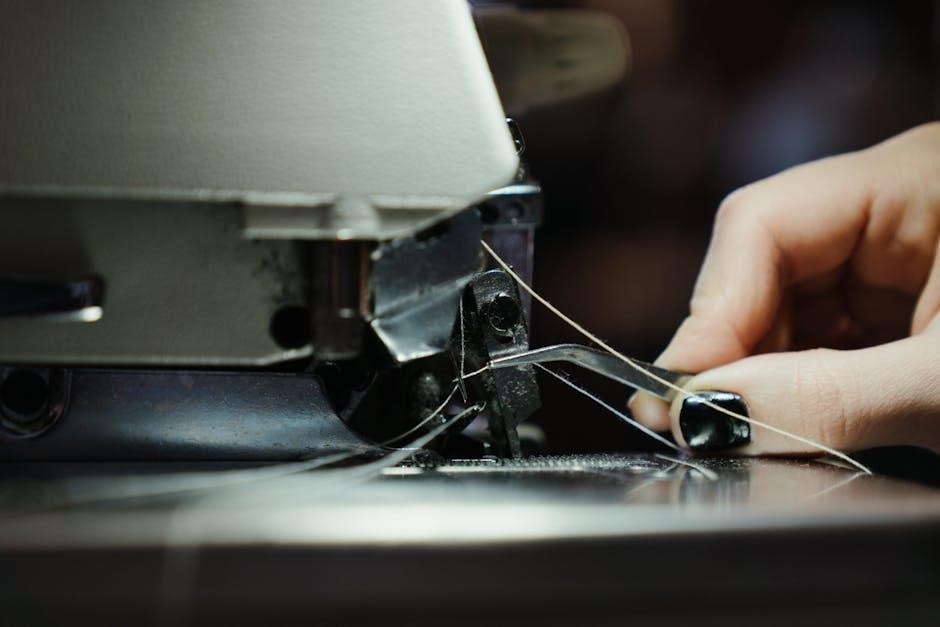
Threading the Upper Thread
Correct upper threading is crucial for seamless sewing. Begin by raising the presser foot and the needle to its highest position. Place the thread spool on the spool pin and guide it through the first thread guide. Continue threading through the tension discs, ensuring the thread sits firmly between them.
Next, lead the thread through the take-up lever and then down through the needle clamp. Finally, thread the needle from front to back. Gently pull the thread a few inches to confirm it’s properly seated. Incorrect threading can cause skipped stitches or tension issues.
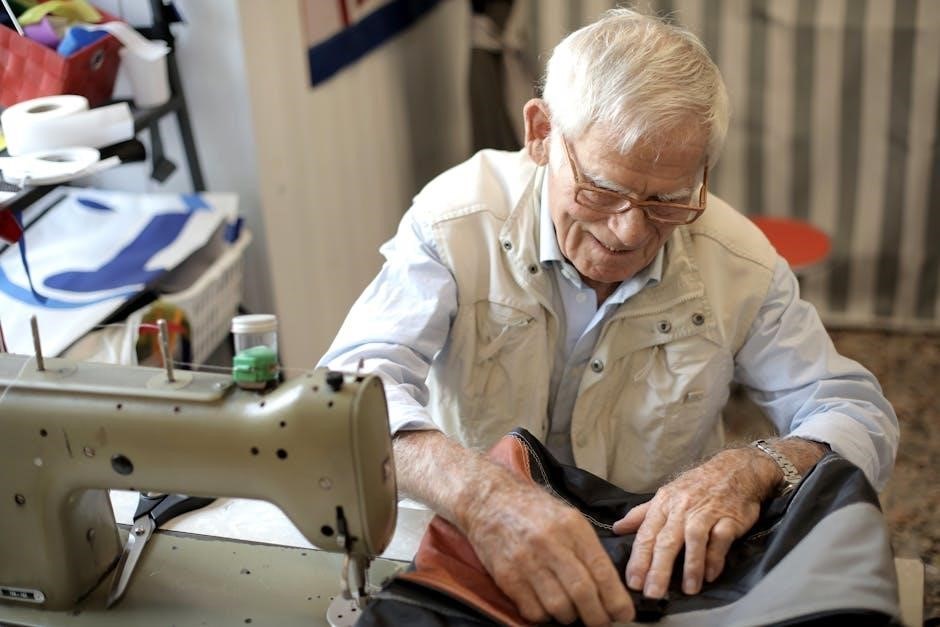
Basic Sewing Operations
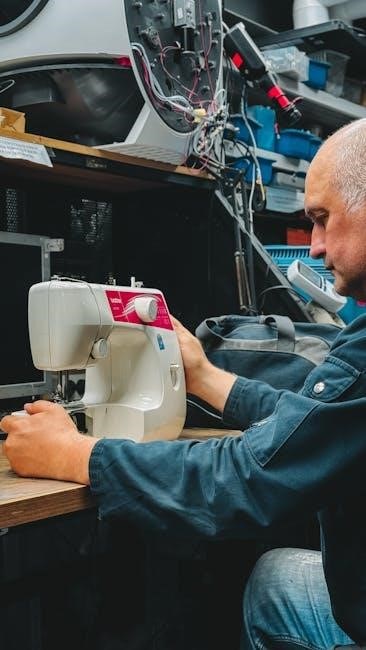
Mastering basic operations unlocks your Brother sewing machine’s potential. Begin with straight stitching, selecting a stitch length appropriate for your fabric. Practice maintaining a consistent seam allowance using the edge guide. Next, explore zigzag stitching, adjusting the width and length for various applications like finishing raw edges or creating decorative elements.
Remember to always test stitch on a scrap fabric before starting your project. Proper tension and needle selection are vital for achieving professional-looking results. Familiarize yourself with the stitch selection dial and foot pressure adjustments for optimal control.
Straight Stitching
Straight stitching is the foundation of most sewing projects. Select the straight stitch option on your Brother machine and adjust the stitch length based on your fabric – shorter for delicate fabrics, longer for heavier materials. Utilize the seam guide on the needle plate to maintain a consistent seam allowance.

Practice sewing straight lines on scrap fabric, focusing on consistent speed and guiding the fabric gently. Ensure proper thread tension for a balanced stitch. A slightly longer stitch length is ideal for basting, while a shorter length provides greater durability for final seams.
Zigzag Stitching
Zigzag stitching offers versatility for various applications. Select the zigzag stitch on your Brother sewing machine and adjust both the stitch width and length. Wider stitches are suitable for finishing raw edges to prevent fraying, while narrower stitches are ideal for reinforcing seams or creating decorative effects.
Experiment with different width and length combinations on scrap fabric to understand their impact. Zigzag stitching is also excellent for sewing stretch fabrics, allowing the seam to expand and contract with the material. Ensure consistent fabric feed for a uniform zigzag line.
Advanced Stitching Techniques
Brother sewing machines offer a range of advanced techniques beyond basic stitching. Mastering buttonhole sewing requires using the designated buttonhole foot and following the machine’s programmed steps for consistent results. Zipper insertion demands precision; utilize the zipper foot and carefully guide the fabric along the zipper teeth.
Explore decorative stitches for embellishment, adjusting settings for unique designs. Quilting features, available on models like the Celeste Innov-is CX1, enable intricate patterns. Remember to practice on scrap fabric before applying these techniques to your final project, ensuring optimal stitch quality and fabric handling.
Buttonhole Sewing
Brother sewing machines simplify buttonhole creation with automated features. Begin by attaching the buttonhole foot – a crucial step for accurate results. Select the appropriate buttonhole stitch setting on your machine, often indicated by a buttonhole symbol. Place your button near the designated markings on the buttonhole foot, guiding the fabric carefully.
The machine will automatically stitch around the button, creating a perfectly sized opening. Always test on scrap fabric first to ensure correct sizing. Different Brother models, like the Inventio NV1350, may have varying buttonhole stitch options. Refer to your specific model’s manual for detailed instructions.
Zipper Insertion
Brother sewing machines offer specialized feet for seamless zipper insertion. Attach the zipper foot, aligning it to either the left or right side depending on the zipper direction. Begin by pinning the zipper tape to the fabric, ensuring even placement. Select a straight stitch and carefully stitch close to the zipper teeth, guiding the fabric smoothly.
For a professional finish, consider using a coordinating thread color. Models like the Celeste Innov-is CX1 may offer automatic zipper foot positioning. Always test on scrap fabric before applying to your project. Refer to your machine’s manual for specific zipper foot guidance and stitch recommendations.
Troubleshooting Common Issues
Brother sewing machines, while reliable, can occasionally encounter problems. Common issues include thread breakage and needle breakage. For thread breakage, re-thread the machine, ensuring proper tension and guide alignment. Check the needle for damage or incorrect size. Needle breakage often stems from forcing the fabric or using a dull needle; replace it immediately.
Consult your model’s manual for specific error codes. Software updates, accessible via Brother iPrint&Scan, can sometimes resolve operational glitches. Remember to back up data before firmware updates, as they may delete stored information like caller ID logs.
Thread Breakage Problems
Thread breakage is a frequent issue. First, re-thread the entire machine, from spool to needle, verifying the thread is correctly seated in each guide and tension disc. Incorrect threading is a primary cause. Ensure the thread spool rotates freely. Next, check the thread tension; too tight or too loose can lead to breaks.
Use the correct thread type and size for your fabric. A damaged or bent needle can also cause breakage – replace it. Finally, confirm the bobbin is wound evenly and inserted correctly. If problems persist, consider a software update via Brother iPrint&Scan.
Needle Breakage Solutions
Needle breakage often stems from improper usage. Always use the correct needle type and size for your fabric weight. Attempting to sew through excessively thick material with a fine needle is a common mistake. Ensure the needle is fully inserted into the machine and tightened securely. Avoid pulling or pushing the fabric while sewing; let the machine feed it.
A bent or damaged needle should be replaced immediately. Check for any obstructions, like pins or thick seams, before starting to sew. Regularly cleaning the bobbin area can prevent issues. Consider updating your machine’s firmware – data loss is possible, so back up!
Maintenance and Cleaning
Regular maintenance extends your Brother sewing machine’s lifespan. Begin by powering off and unplugging the machine. Cleaning the bobbin area is crucial; lint and thread buildup can cause issues. Use a small brush to remove debris. Oiling the machine, particularly moving parts, ensures smooth operation – consult your model’s specific instructions for oiling points.
Dust the exterior with a soft cloth. Avoid using liquid cleaners directly on the machine. For deeper cleaning, consider professional servicing. Remember firmware updates are available, but back up data first, as updates can cause data loss!
Cleaning the Bobbin Area
A clean bobbin area is vital for consistent stitch quality. Begin by removing the bobbin case. Use a small brush, or compressed air, to gently dislodge lint, thread fragments, and dust from the bobbin case and the surrounding cavity. Inspect the feed dogs for accumulated debris and clean them thoroughly.
Avoid using sharp objects that could damage delicate components. Regularly cleaning this area – ideally with each bobbin change – prevents jams and ensures smooth thread flow. A buildup of lint can significantly impact sewing performance, leading to skipped stitches or tension problems.
Oiling the Machine
Proper lubrication ensures your Brother sewing machine operates smoothly and extends its lifespan. Use only Brother-approved sewing machine oil. Apply a small drop to the designated oiling points, typically located around the bobbin area, hook mechanism, and presser foot bar.
Avoid over-oiling, as excess oil can attract dust and create a sticky residue. After oiling, operate the machine slowly for a few minutes to distribute the oil evenly. Wipe away any excess oil with a clean, soft cloth. Regular oiling, as per your machine’s manual, prevents friction and wear on moving parts.
Software and Driver Updates
Keeping your software and drivers current is crucial for optimal performance and compatibility with your computer. Brother iPrint&Scan offers printing, scanning, and workflow functionality for PC and Mac. Download the latest versions from the official Brother support website (https://support.brother.com).
Firmware updates improve machine functionality, but be aware that they may delete stored data like print jobs and caller ID logs. Before updating, back up any important information. Use the Brother website to check for available firmware updates specific to your model. Regularly checking for updates ensures a seamless sewing experience.
Downloading Brother iPrint&Scan
Brother iPrint&Scan provides convenient access to printing and scanning features directly from your PC or Mac. To download, visit the Brother support website and navigate to the software download section for your specific machine model. Ensure compatibility with your operating system (Windows 11 supported for some models).
The software offers workflow functionality, though supported features vary based on your machine’s capabilities. Installation is straightforward, typically involving running the downloaded installer and following the on-screen prompts. This application enhances your sewing experience by streamlining document handling and creative projects.
Updating Firmware (Data Loss Warning)
Firmware updates are crucial for optimal Brother sewing machine performance, but proceed with caution! Updating will erase stored data, including secured print data, caller ID logs, journal reports, and outgoing messages – features dependent on your specific model. Back up any essential information before initiating the update process.
Download the latest firmware from the official Brother support website, ensuring it matches your machine’s model number. Follow the provided instructions meticulously during installation. Data loss is unavoidable during this process, so prioritize backing up important settings beforehand to avoid permanent deletion.
Warranty Information
Brother offers a limited warranty on its sewing machines, protecting against manufacturing defects. To determine your warranty coverage, utilize the Machine Warranty Calculator available on the Brother support website. You’ll need your machine’s 15-digit serial number and the original purchase date to access this information.
The warranty period begins on the date of purchase. Retain your proof of purchase for warranty claims. Brother’s warranty doesn’t cover damage caused by misuse, accidents, or unauthorized repairs. View your warranty details online by entering the required information for a precise coverage overview.
Using the Warranty Calculator
Brother’s online Machine Warranty Calculator is a convenient tool to quickly ascertain your sewing machine’s warranty status. Access the calculator through the Brother support website. You will be prompted to enter two crucial pieces of information: your machine’s unique 15-digit serial number and the original date of purchase.
Ensure accuracy when inputting these details. After submission, the calculator will display your warranty start date and coverage period. This allows you to easily verify if your machine is still under warranty. Keep your purchase receipt handy, as it may be required when submitting a warranty claim.
Serial Number and Purchase Date Requirements
Brother requires both the 15-digit serial number and the original purchase date to validate warranty claims. The serial number uniquely identifies your sewing machine model and manufacturing details. It’s typically located on a sticker affixed to the machine’s body, often in the bobbin area or on the rear panel.
The purchase date, as indicated on your sales receipt or invoice, establishes the warranty start date. Accurate information is vital; discrepancies may delay or invalidate your claim. Retain these documents securely for the duration of the warranty period. Brother utilizes these details to confirm eligibility and provide appropriate service.
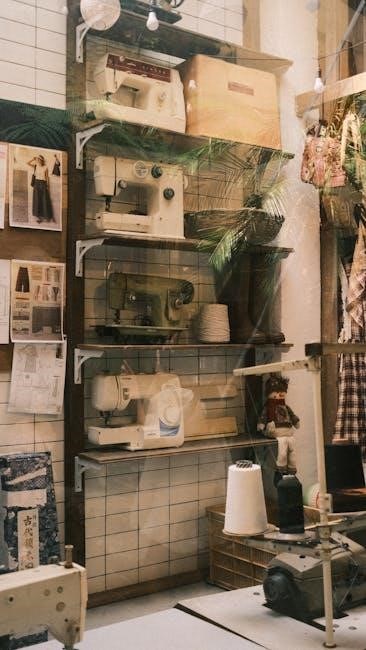
Exploring Brother Sewing Machine Models
Brother offers a diverse range of sewing machines catering to various skill levels and project needs. The Inventio NV1350 is designed for creative expression, while the Celeste Innov-is CX1 excels in both sewing and quilting. These models boast numerous built-in stitches and user-friendly features.
For high-speed performance, consider the PQ1600S, ideal for quilting and garment construction. The FS110X provides a balance of features and affordability. Brother continually innovates, offering machines like the L14s, LX17, and XR27NT, each with unique capabilities. Explore the options to find the perfect fit for your sewing endeavors!
Inventio NV1350 Sewing Machine
The Inventio NV1350 is a versatile sewing machine designed for both beginners and experienced sewers. It offers a wide array of features, enabling creative projects with ease. This model provides a user-friendly experience, boasting intuitive controls and a selection of built-in stitches.
It’s perfect for various applications, from basic garment construction to intricate quilting. The NV1350’s robust construction ensures durability, while its lightweight design allows for portability. Explore its capabilities to unlock your sewing potential and bring your visions to life with precision and style.
Celeste Innov-is CX1 Sewing and Quilting Machine
The Celeste Innov-is CX1 is a sophisticated sewing and quilting machine, ideal for those seeking advanced features and creative flexibility. Boasting 760 built-in stitches, it empowers users to tackle diverse projects with precision and artistry. Its innovative design incorporates user-friendly controls and automated functions, streamlining the sewing process.
This model excels in quilting, offering ample workspace and specialized stitches for intricate designs. The CX1’s robust construction ensures reliability, while its elegant aesthetic adds a touch of style to any sewing space. Unlock your creative potential and experience the joy of seamless sewing with the Innov-is CX1.
Specific Model Features
Brother offers a diverse range of sewing machines, each with unique capabilities. The Brother L14s provides essential features for beginners, while the Brother LX17 offers enhanced stitch options and convenience. Stepping up, the Brother XR27NT delivers even greater versatility with a wider selection of stitches and automated functions.
These models cater to varying skill levels and project requirements. Exploring specific features—like stitch count, speed, and automated threading—is crucial for selecting the ideal machine. Understanding these distinctions ensures a satisfying sewing experience tailored to individual needs and creative aspirations.
Brother L14s Features
The Brother L14s is an excellent entry-level sewing machine, ideal for beginners and simple projects. It boasts 14 built-in stitches, providing versatility for basic repairs and crafting. This model features an automatic needle threader, simplifying setup and saving time. A drop-in bobbin system ensures easy bobbin replacement and monitoring.
The L14s is lightweight and portable, making it convenient for classes or storage. It offers adjustable stitch length and width, allowing for customization. While lacking advanced features, its simplicity and reliability make it a fantastic starting point for anyone learning to sew.
Brother LX17 Features
The Brother LX17 expands upon the L14s, offering 17 built-in stitches for increased project possibilities. It retains the convenient automatic needle threader and easy-to-use drop-in bobbin system. This model includes a wider range of stitch options, such as decorative stitches, enhancing creative sewing endeavors.
Like the L14s, the LX17 remains lightweight and portable, suitable for various sewing environments. Adjustable stitch length and width provide greater control over stitch appearance. It’s a step up for those seeking more versatility without the complexity of higher-end machines, making it a solid choice for intermediate sewers.
Brother XR27NT Features
The Brother XR27NT is a popular choice, boasting 27 built-in stitches, offering a diverse range for various sewing projects. It includes an automatic needle threader, simplifying setup, and a quick-set drop-in bobbin for ease of use. This model features a helpful instructional DVD, beneficial for beginners learning sewing techniques.
The XR27NT also offers adjustable sewing speed and stitch length/width control, providing customization. Its lightweight design enhances portability, while the free arm facilitates cuff and sleeve sewing. It’s a versatile machine suitable for both beginners and experienced sewers seeking reliable performance and a broad stitch selection.
High-Speed Models
Brother offers high-speed sewing machines designed for efficiency and productivity, catering to professionals and enthusiasts alike. The PQ1600S stands out with its impressive 1500 stitches per minute, ideal for quilting and large projects. It features an extended table for fabric support and precise feeding, ensuring consistent stitch quality.

The FS110X is another high-speed option, delivering rapid sewing capabilities. These models prioritize speed without compromising stitch accuracy. They often include features like automatic thread trimming and knee-lift mechanisms, streamlining the sewing process. High-speed Brother machines are built for durability and performance.
Brother PQ1600S Sewing and Quilting Machine
The Brother PQ1600S is a dedicated high-speed sewing and quilting machine, boasting an impressive 1500 stitches per minute. Its design prioritizes efficiency for larger projects. An extended table provides ample fabric support, crucial for quilting. Precise feeding ensures consistent stitch quality across various materials.
This model features an automatic needle threader and automatic thread trimming, enhancing workflow. The PQ1600S is built with a robust frame for stability at high speeds. It’s a favorite among quilters and professionals needing rapid, reliable performance. Explore its capabilities for streamlined sewing and quilting!
Brother FS110X Sewing Machine
The Brother FS110X is a versatile sewing machine designed for both beginners and experienced users. It offers a balance of features and affordability, making it a popular choice. This machine boasts a variety of built-in stitches, catering to diverse sewing projects. An easy-to-use interface simplifies operation, while the automatic needle threader saves time and effort.
The FS110X includes a drop-in bobbin system for convenient threading. Its lightweight design enhances portability, allowing for easy setup and storage. Explore its capabilities for garment construction, home décor, and creative sewing endeavors. It’s a reliable machine for everyday sewing needs!
Be First to Comment